

Introduction
Transform your home’s aesthetic with these easy-to-follow DIY floating shelves. Not only do they add functionality, but they also serve as a chic decor element. Perfect for any room, from the kitchen to the living room.
Why Floating Shelves Are Trending
Floating shelves have become a staple in modern home design due to their versatility and minimalist appeal. They offer storage solutions without cluttering your space, adding both beauty and practicality.
Advantages of Floating Shelves
- Space-saving: Ideal for small spaces or tight corners.
- Aesthetic appeal: Enhance your decor with a sleek, modern look.
- Versatility: Suitable for various rooms and purposes, from kitchen storage to bathroom organization.
Choosing the Right Materials
Selecting the right materials is crucial for both functionality and style. Consider the following options:
Material Options
- Wood: Provides a natural, warm look. Opt for reclaimed wood for an eco-friendly choice.
- Metal: Offers a sleek, industrial vibe. Metal shelves are durable and easy to maintain.
- Glass: Adds a modern touch with transparency. Perfect for displaying decorative items.
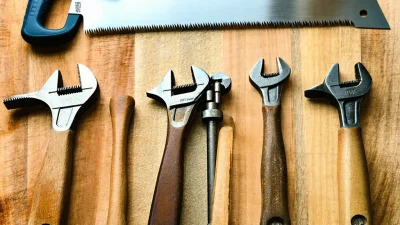
Tools You’ll Need
Before diving into the project, ensure you have all necessary tools:
- Saw: For cutting materials to size.
- Drill and screws: Essential for securing shelves and brackets.
- Miter: For precise cuts on wood or metal edges.
- Sandpaper: Smooth out any rough edges after cutting.
- Measuring tape: Accurate measurements are key to a clean installation.
Step-by-Step Installation Guide
Follow these simple steps for a seamless installation:
- Measure and Plan: Determine where you want your shelves. Use a measuring tape to mark the wall accurately.
- Cut Materials: Based on measurements, cut your chosen material to size using a saw or miter.
- Sand Edges: Smooth all edges with sandpaper for safety and aesthetics.
- Mark Wall Anchors: Use a pencil to mark where brackets will go. Double-check measurements for precision.
- Drill Holes: Drill pilot holes at marked spots to prevent wall damage during screw insertion.
- Secure Brackets: Attach brackets to the wall using appropriate screws and drill bits.
- Attach Shelves: Carefully place each shelf into its bracket, ensuring alignment. Tighten screws securely.
Tips for Styling Your Floating Shelves
Once installed, it’s time to showcase your style with these tips:
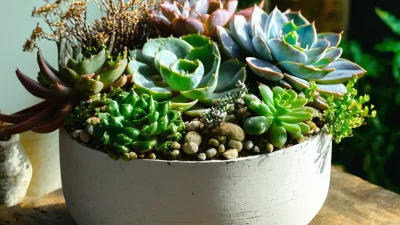
- Mix and Match: Combine decorative items like books, plants, and vases for a balanced look.
- Add Lighting: Incorporate LED strip lights under shelves for a subtle glow or task lighting.
- Purpose-Driven Storage: Use lower shelves for frequently accessed items and upper ones for decor or less-used items.
Maintenance Tips
To keep your floating shelves in top condition, follow these maintenance tips:
- Clean Regularly: Dust shelves weekly to maintain their appearance and prevent buildup.
- Inspect Hardware: Periodically check screws and brackets for tightness. Tighten as needed.
- Consider Finishes: If using wood, apply a protective finish like oil or varnish to preserve the material over time.
Conclusion
With these simple steps and tips, creating DIY floating shelves is an achievable project that can elevate your home’s style. Whether you’re a seasoned DIY enthusiast or a first-time crafter, the result will be worth the effort. Happy crafting!