
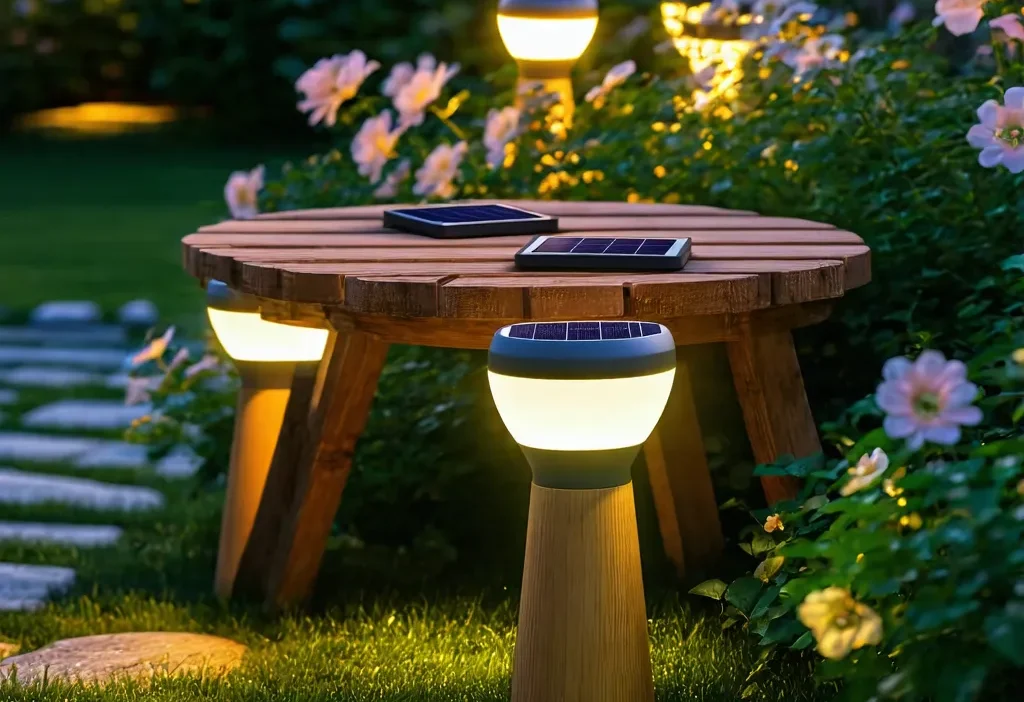
Introduction to DIY Solar Lights
Have you ever wondered how to bring a touch of enchantment to your garden or outdoor spaces without relying on electricity? DIY solar lights are the perfect solution! They’re eco-friendly, cost-effective, and can be customized to match any aesthetic. In this guide, we’ll walk you through everything you need to know to create your own DIY solar lights from scratch.
Materials You’ll Need
Before diving into the project, let’s gather all the necessary materials. Here’s a list of what you’ll need:
- Solar panels (small)
- Lithium batteries
- LED lights
- Plywood or any durable wood for the lamp body
- Acrylic paint or weather-resistant paint
- Screws and nails
- Glue gun
- Drill machine
Pro Tip: Always ensure your materials are of good quality to guarantee the longevity of your solar lights.
Step-by-Step Instructions
1. Designing Your Solar Light
Start by sketching out your design. Think about the shape, size, and style you want for your solar light. Whether it’s a sleek modern look or a rustic charm, the design is entirely up to you! Once you have your design ready, cut the plywood according to the dimensions.
2. Drilling Holes
Using a drill machine, create holes in the wood where you want to place the LED lights and solar panel. Ensure the holes are slightly larger than the components to allow for easy installation.
3. Installing Components
Screw the LED lights into their respective holes. Make sure they’re securely fastened. Then, attach the solar panel on top of the lamp body using screws. Connect the solar panel and LED lights with wires according to the manufacturer’s instructions.
4. Painting
Time to give your solar light a personalized touch! Paint the entire structure with acrylic or weather-resistant paint. Let it dry completely before proceeding further.
5. Adding Finishing Touches
Once the paint is dry, apply a clear coat of sealant to protect the surface from weather damage. This will ensure your solar light remains durable and attractive for years to come!
Tips for Maximizing Efficiency
- Placement: Position your solar lights in areas that receive maximum sunlight during the day to ensure they charge fully.
- Batteries: Use high-quality lithium batteries to prolong their lifespan and maintain consistent brightness.
- Cleaning: Regularly clean the solar panels to prevent dust or dirt from blocking sunlight absorption.
The Benefits of DIY Solar Lights
Creating your own solar lights offers numerous advantages. Not only are they environmentally friendly, but they’re also a cost-effective way to illuminate your outdoor spaces. Plus, the satisfaction of crafting something functional and beautiful with your own hands is unmatched!
Frequently Asked Questions
1. How long do DIY solar lights last?
If maintained properly, they can last several years.
2. Can I use different types of paint?
Yes, but ensure the paint is weather-resistant to withstand outdoor conditions.
Conclusion
With this comprehensive guide, you’re now ready to create your very own DIY solar lights! It’s a rewarding project that combines creativity with sustainability. Don’t forget to share your creations with friends and family – they’ll surely be impressed by your handywork!